

Photography Lighting, When Natural Light Won’t Do
The day we planned to shoot the December issue of Simply KC Magazine, I awoke to dark November skies. No sun was evident behind the thick cover of clouds. But in photography lighting is the key between great and mediocre. On a dark November day I chose to make my own light.
As we began setting up, a light mist began showered us with yet another element with which to contend. Shooting on-location at the Midland Christmas Tree Farm, I put together a couple of lights and made some magic happen!
(My gear: Canon 580 Ex Flash through white umbrella, Travel light diffused with softbox which was plugged into an outlet powered by my vehicle, pocket wizards to remotely trigger flash.)
A lot of the information below will be photo-speak. Feel free to skip. The simple recipe is calculate the ambient exposure and add light as needed. Use light modifiers to adjust specifications of light- amount, intensity, direction. Simple enough, right?
First things first, Adjust your ISO
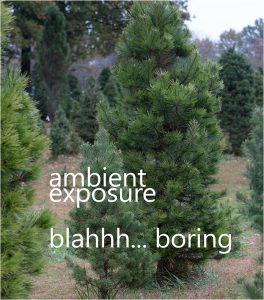
I used the sun and calculated the ambient light as my main source of light. Two other lights were used as additional fill. First, I needed to determine ISO and shutter speed. If you are shooting with an SLR camera (Single Lens Reflex) your shutter speed must sync when your lights fire. This is typically 250 or less so I start with a low ISO between 200-400. Meter the area to determine your corresponding F-stop with a shutter speed of 200. You might need to adjust your ISO to find an F-stop that works for your shot.
My SLR Canon syncs with flash at 200- so my target ISO was one that would yield a 200/second shutter speed. On this particular day, my camera was set at ISO 250 most of the time. My shutter speed was 200 @ f4.5-6.3 (depending on the shot).
- *Tip: Shooting slower than 200, and you’ll subject yourself to camera shake or movement when shooting people. You must shoot fast enough to FREEZE any movement.
Balance Shutter Speed and F-Stop
Once you’ve balanced the ambient light and found your settings, it’s time to add your light!
- ISO-: Your camera’s sensitivity to light. The lower the number, the less sensitive.
- Shutter Speed: The duration of the exposure, how long the ‘film’ is exposed to light.
- F-Stop: Controls the amount of light that is let into the camera which corresponds to your depth of field.
.jpg)
.jpg)
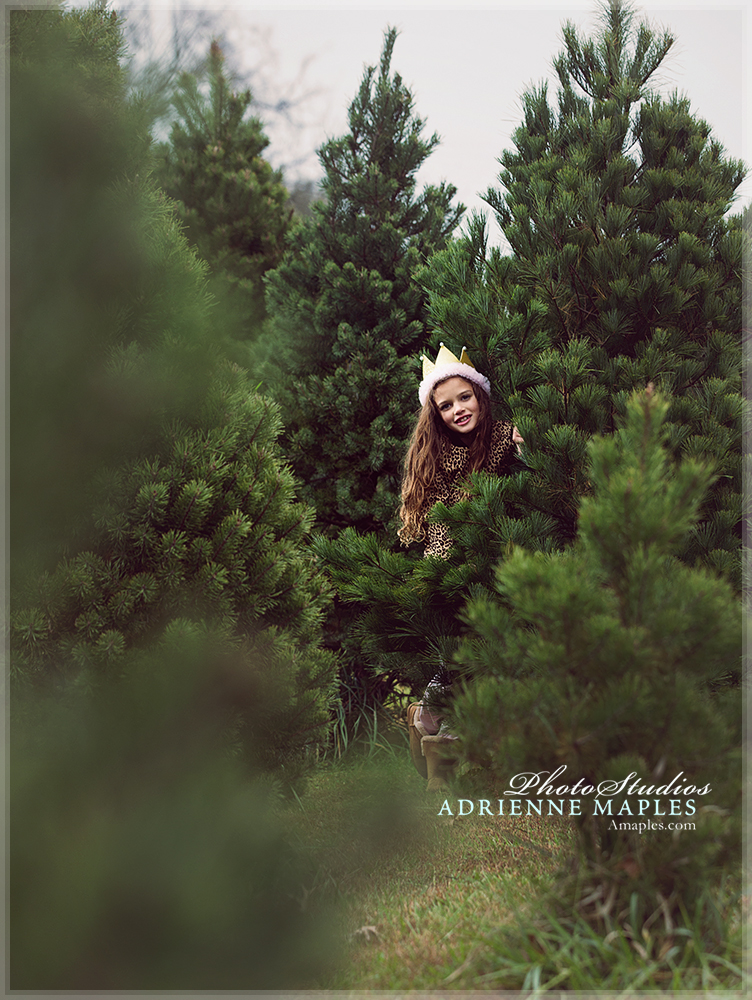
Add Your Own Light
So here’s what I determined the best solution. I added a soft box to the front of my subject to provide even soft light on her face. Behind her, just hidden out of sight of the tree, I chose to use a back light (flash unit shooting through umbrella) to light the back of my subject. You can see the light hitting the the face of the stylist as well as the ladies in the background. This helped separate mt model from the trees and provided depth in my frame.
Light Modifiers
Add one more thing to the complexity of lighting and that, my friend, is modifiers! Whether you are using a soft box, bare bulb, grids, barn doors, umbrellas, etc., each modifier will achieve different results. They are designed to allow further control over the intensity, direction of light and ultimately the mood of the photograph. Use them wisely!
Happy Shooting!